Well the seedlings are coming along nicely. It's the end of March, So were now two weeks from the 1st of the seedlings going into the ground. Now it's time to plant watermelons.Watermelons have a special place in my heart, so I have accumulated a fair amount of information on how to grow them from seed.
Sow indoors in late March or one
month (no sooner!) before transplanting outdoors when the weather is
frost-free, warm, and settled. Plant about 1/4" deep.
Keep temperature 80-90°F (27-32°C) until germination. The seeds need constant warmth, again 80° to 90° for 5 to 10 days to germinate well. For seedless varieties this need is greater. Handle young
plants carefully and never let the soil dry out. Grow seedlings at 75°F
(24°C). Once they are up and growing, fertilize the seedlings with diluted fish emulsion twice a week, using a 1/2 - 3/4 strength solution. Reduce water and temperature for a week before transplanting during the hardening off process.
After the threat of frost is over and only when the outside soil temperature is at least 60°F, transplant. To help heat overly cool soil, try using black mulch under the plants. Remove this prior to summer or add topping of hay/straw mulch to keep soil from getting too hot.
Even hardened melon
seedlings are tender! Large melon seedlings transplant poorly. Do not disturb roots when transplanting, and
water thoroughly.Transplant into hills or rows. Set transplants, 18" to 36" apart apart in groups of 2-3 if planting in hills depending on how large your watermelons will become. They will require more space to grow the larger the species at maturity. Space hills 3'-4' apart each way. Set transplants 36" to 96" apart if planting in rows, again depending on species. Southern exposure and sweet, light, well-drained soil is ideal. Good soil moisture is important in early stages of growth and during pollination when fruits are setting. After this point do not water unless the soil is very dry and leaves begin to show signs of wilting in midday.
After mid June add mulch, not before. Also melons do not need high nitrogen. You want to try to promote simultaneous fruiting on the same plant. If one fruit starts on a plant and then some time later another starts on the same plant, the 1st larger fruit will suck up all that plants nutrients, and the smaller 2nd fruit will suffer. So if two fruits set at the same time I allow both to grow, if two fruits start one behind the other, I pinch off the 2nd one. I also pinch off all but 2 melon per vine. Feed every 3 weeks with low nitrogen fertilizer. Again here I use a fish emulsion foliar. Foliar feeding is a technique of feeding plants by applying liquid fertilizer directly to their leaves. I add it when I water. More on how I do that when we reach that point later in the season. I have a wonderful tool that allows me to add liquid fertilizer during watering.
Cucumber Beetles: These things are "demon spawn" as far as I am concerned. They have decimated my Curcurbit crops before. They munch on the young seedlings, they suck the juice from the young plants. When the transplants first go into the garden, I have started to cover them with insect fabric. I use Agribon AG-15, 0.45 oz Frost Blanket (9'10" X 250'), this is a great product. It is a super lightweight fabric (0.45 oz/sq yd) and is especially designed to protect vegetable crops from insect pests. Made of spun bonded polypropylene fabric. It lets 90% of the sunlight pass through. I keep the young seedlings covered until they begin to flower. At that point they are larger and have a chance to fend off the dreaded beetle's onslaughts. Once I remove the fabric, I then fall back on the only recourse that I have found that will keep the beetles at bay, Seven Insect spray. I know it's not organic, but I have tried all the organic sprays, the beetles just laugh at them. They have not worked for me. Seven is the only thing I have had success with.
Some melon types, like Honeydew, Charentais, Canary, Spanish, and Crenshaw are overripe by the time the stem can be tugged from the fruit. These must be cut from the vine.
This year I planted:
Large Watermelon - AllSweet and Moon and Stars
Personal Size Watermelon - Burpees Snack Pack
Crenshaw - Burpees Hybred Crenshaw
Last year I had watermelon germination after only 3 days. We will see what happens this year.
Update on other seedlings:
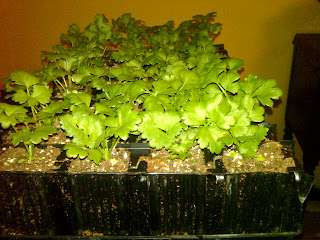 |
| Celery at 6 weeks |
 |
| Another picture of celery |
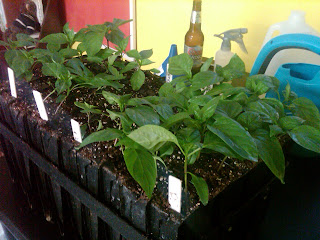 |
| Peppers at one month |
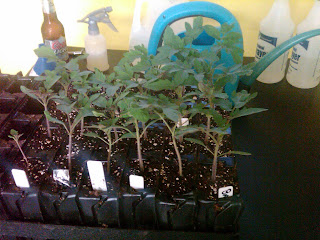 |
| Tomatoes at one month |
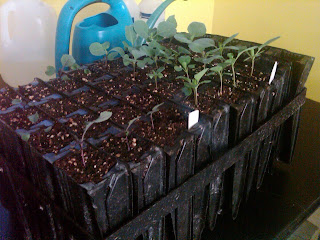 |
| Cabbage at one month |
Perennial Update:
 |
| Horseradish |
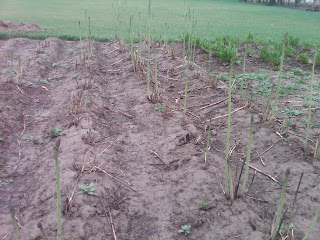 |
| Asparagus, it turns out asparagus is one of the earliest of spring crops. I did not know that. The date of this picture was around the 15th of March. This is one year after planting the crowns. |
 |
| Strawberries, this is about one week after removing the winter hay protection. And it is one year after planting the crowns. I should see my first crop of strawberries this summer, can't wait. |
 |
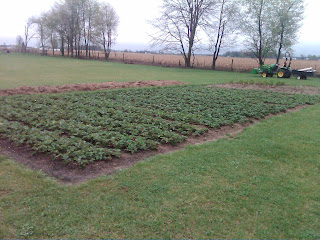
| Matted rows of strawberries |
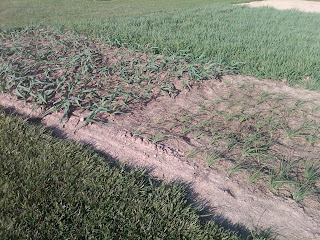 |
| Garlic on the left, Shallots on the right. This was a very windy day, that is why they look blown over. |
 |
| Wind blown shallots |
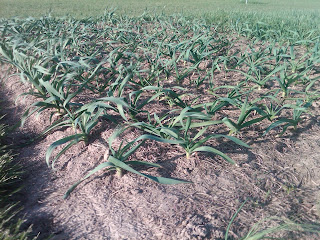 |
| Wind blown garlic |
Winter Rye Cover Crop:
 |
| Winter Rye cover crop. This is destined to be tilled into soil. |


No comments:
Post a Comment