Saturday, March 31, 2012

End of March Garden Update

Well the seedlings are coming along nicely. It's the end of March, So were now two weeks from the 1st of the seedlings going into the ground. Now it's time to plant watermelons.Watermelons have a special place in my heart, so I have accumulated a fair amount of information on how to grow them from seed.

Sow indoors in late March or one month (no sooner!) before transplanting outdoors when the weather is frost-free, warm, and settled. Plant about 1/4" deep. Keep temperature 80-90°F (27-32°C) until germination. The seeds need constant warmth, again 80° to 90° for 5 to 10 days to germinate well. For seedless varieties this need is greater. Handle young plants carefully and never let the soil dry out. Grow seedlings at 75°F (24°C).  Once they are up and growing, fertilize the seedlings with diluted fish emulsion twice a week, using a 1/2 - 3/4 strength solution. Reduce water and temperature for a week before transplanting during the hardening off process.

After the threat of frost is over and only when the outside soil temperature is at least 60°F, transplant. To help heat overly cool soil, try using black mulch under the plants. Remove this prior to summer or add topping of hay/straw mulch to keep soil from getting too hot.

Even hardened melon seedlings are tender! Large melon seedlings transplant poorly. Do not disturb roots when transplanting, and water thoroughly.Transplant into hills or rows. Set transplants, 18" to 36" apart  apart in groups of 2-3 if planting in hills depending on how large your watermelons will become. They will require more space to grow the larger the species at maturity. Space hills 3'-4' apart each way. Set transplants 36" to 96" apart if planting in rows, again depending on species. Southern exposure and sweet, light, well-drained soil is ideal. Good soil moisture is important in early stages of growth and during pollination when fruits are setting. After this point do not water unless the soil is very dry and leaves begin to show signs of wilting in midday.

 After mid June add mulch, not before. Also melons do not need high nitrogen. You want to try to promote simultaneous fruiting on the same plant. If one fruit starts on a plant and then some time later another starts on the same plant, the 1st larger fruit will suck up all that plants nutrients, and the smaller 2nd fruit will suffer. So if two fruits set at the same time I allow both to grow, if two fruits start one behind the other, I pinch off the 2nd one. I also pinch off all but 2 melon per vine. Feed every 3 weeks with low nitrogen fertilizer. Again here I use a fish emulsion foliar. Foliar feeding is a technique of feeding plants by applying liquid fertilizer directly to their leaves. I add it when I water. More on how I do that when we reach that point later in the season. I have a wonderful tool that allows me to add liquid fertilizer during watering.

Cucumber Beetles: These things are "demon spawn" as far as I am concerned. They have decimated my Curcurbit crops before. They munch on the young seedlings, they suck the juice from the young plants. When the transplants first go into the garden, I have started to cover them with insect fabric. I use Agribon AG-15, 0.45 oz Frost Blanket (9'10" X 250'), this is a great product. It is a super lightweight fabric (0.45 oz/sq yd) and is especially designed to protect vegetable crops from insect pests. Made of spun bonded polypropylene fabric.  It lets 90% of the sunlight pass through. I keep the young seedlings covered until they begin to flower. At that point they are larger and have a chance to fend off the dreaded beetle's onslaughts. Once I remove the fabric, I then fall back on the only recourse that I have found that will keep the beetles at bay, Seven Insect spray. I know it's not organic, but I have tried all the organic sprays, the beetles just laugh at them. They have not worked for me. Seven is the only thing I have had success with.  

Some melon types, like Honeydew, Charentais, Canary, Spanish, and Crenshaw are overripe by the time the stem can be tugged from the fruit. These must be cut from the vine.

This year I planted:
Large Watermelon - AllSweet and Moon and Stars
Personal Size Watermelon - Burpees Snack Pack
Crenshaw - Burpees Hybred Crenshaw

Last year I had watermelon germination after only 3 days. We will see what happens this year.


Update on other seedlings:

Celery at 6 weeks


Another picture of celery

 
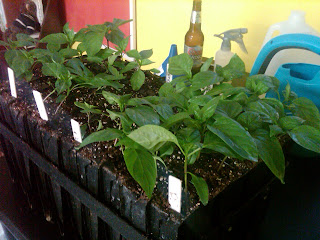
Peppers at one month

Tomatoes at one month

Cabbage at one month

Perennial Update:


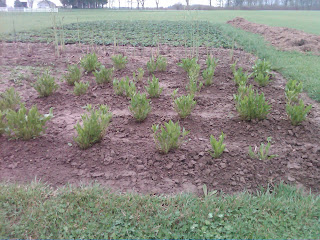
Horseradish


Asparagus, it turns out asparagus is one of the earliest of spring crops. I did not know that. The date of this picture was around the 15th of March. This is one year after planting the crowns.


Strawberries, this is about one week after removing the winter hay protection. And it is one year after planting the crowns. I should see my first crop of strawberries this summer, can't wait.


Matted rows of strawberries


Garlic on the left, Shallots on the right. This was a very windy day, that is why they look blown over.


Wind blown shallots


Wind blown garlic

 Winter Rye Cover Crop:

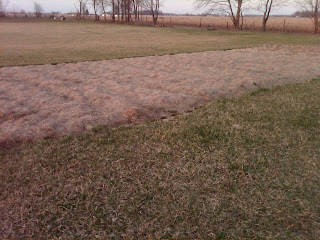
Winter Rye cover crop. This is destined to be tilled into soil.


Friday, March 30, 2012

Duck Confit

I love duck, roast duck, grilled duck breast, and especially duck Confit. Traditionally this technique was a way to preserve meat prior to refrigeration. It's persistence into the modern era is a testament to the flavor of the finished  product.

This technique can be applied to items other than duck, such as any poultry, pork, beef and yes even fish. And although ideally you want to use the same fat as the item being used, any neutral fat such as canola oil can be substituted.

Having said that, I have a nice big young duck and I want to confit it.

De-bone duck;

Typical grocery store duck, size not very important, I try to get the biggest one I can

Remove from wrapping, rinse inside and out under cold water, pat dry

Look at those beautiful globes of duck fat at the rear of the cavity

Break down, leave thigh and drumstick connected

One side broken down


Remove the legs, breast, and wings, separate the wings at the joint. Do not separate the thigh from the drumstick.


Cryovac duck breasts, reserve for later use.


I have a couple of cups of Goose fat, left over from roasting a Christmas goose. I saved this just for duck confit, but I don't think that it will be enough. So I will render all the fat from the duck carcass by slowly roasting it at 300°. After doing this it produced another 2 cups of beautiful duck fat. So together with the goose fat, I have about 4 cups of fat total available for this confit.

Duck carcass about to go into oven to render fat

Ingredients:

Young Duck - Size unimportant
Duck Fat - About 4 c. ( I supplemented with goose fat, as stated above)

Salt Mixture: Mix to combine
Kosher Salt - 600 g.
Morton Tender Quick - 20 g.  The original recipe called for 2% Sodium Nitrate, I did not have that so I substituted tender quick)
 
Spice Mix:
Garlic - smashed - 3 cloves
Shallots - minced - 1 large
Fresh Thyme Sprigs - 1 per each piece of duck - (I did not have fresh so I used dried)
Fresh Rosemary - 1 small per each piece of duck - (I did not have fresh so I used dried)
Bay Leaf - 2 each
Black peppercorns - 1/4 tsp.
Cloves - 3 each

Note: So not having any fresh herbs I ground all dried herbs in a mortar. If I had fresh, I would have simply ground the peppercorns and cloves.


Ready to grind dry spices. How about that mortar? It;s huge and weighs 20+ lbs! I love it.


After grinding


 Coat all duck pieces with spices and aromatics


Place into bowl

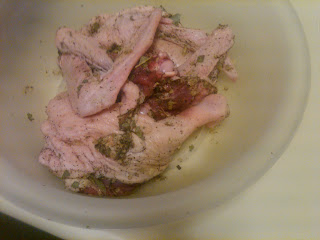
Add spices and aromatics and mix to coat well

Take a small sheet pan, and put about 1/8" layer of salt mixture on it. Lay duck pieces on top of salt mixture.


About 1/8" layer of salt mixture

Lay duck on top

Completely cover duck with remaining salt mixture. What we are doing here, is setting the stage to dry cure the duck. This is a method of food preservation that goes back hundreds of years if not longer. The salt will draw out the moisture in the duck, this will help it to stay edible much longer than if you did not do this.

Don't be too particular, just try to cover the duck as much as possible

Place a 2nd sheet pan on top of salted duck, and add weight. Cans work well for the weight, I did not have the room in my refrigerator to allow for large cans, so I used good old fashioned bricks.

Low tech duck press

 Place all into refrigerator for 24 hours. Less time and your duck will not be cured properly, longer and the duck will become too salty


After 24 hours, remove from refrigerator and rinse as much of the salt and spices off under cold water as possible. Then place in a bowl of cool fresh water, make sure all of the duck is completely covered in water, allow to soak for at least two hours to leech out as much salt as possible. The water should end up very salty tasting. Place rinsed duck onto a rack on a sheet pan and replace into refrigerator for 4 hours. This will again result in pulling out any excess moisture on the duck from rinsing it.


After 24 hours in the refrigerator curing

Rinsed and ready to go into refrigerator to dry off

 Prepare fat by heating it until it is just hot. Do not overheat, you should not allow the fat to get so hot that it begins to cook the duck when the two are combined


Heating fat


Place duck into small (2 1/2 quart) dutch oven, add hot fat


Ready for fat

Place into preheated 200° oven for 6-8 hours. Do not be alarmed by such a low oven temperature like I was when I 1st did this, the oven felt barely warm, I was sure it wouldn't cook. As it turned out, my fears where unfounded. It is done when duck is all but falling off the bone. I let mine go for a whole 8 hours. I then allow the dutch oven to come to room temperature on top of the stove, cover with lid and place into refrigerator to "mature". The duck can be used at any point now, but I believe to achieve the true confit experience you must allow the duck to mature in the fat for a minimum of two weeks, a month is better.

To remove from the fat, you can place the dutch oven over low heat to gently melt the fat to the point that you can carefully remove the duck. 

This is now traditional duck confit. You can shred it into mixed greens and create a duck confit salad, it is an essential ingredient in cassoulet, you can make any number of Hors d'oeuvres with it,  . Being the simple guy I am, I shred and make Duck confit, American cheese and dill pickle sandwiches with it. So good.


To be sure were clear, what you now have is properly preserved duck covered in duck fat. This is how it was done long before we had refrigeration. This product could last up to a month or more at room temperature. The salt has cured it, the fat protects it. The fat will go rancid long before the duck does. In the refrigerator, this product will easily last up to 3 months.

Perfectly preserved

Will keep up to 3 months +  in refrigerator

One month later, the unveiling

 
Ten minutes at 450° to crisp the skin
 

And it's ready


The best way to filter duck fat, heat slightly and use the coffee maker filtering system. Works great


And there you have it.

Monday, March 19, 2012

80's in the Middle of March!

Week of March 12th and we hit 80° twice, unbelievable weather. Were not supposed to see this kind of heat for another 45 days. Should be planting peas, potatoes, and onions, but I haven't even tilled the garden yet. My seed potatoes and onions aren't even scheduled to arrive for another two weeks. Still have too many non-garden chores I am trying to finish up before full on garden season begins. So this "Late-May" type weather is killing me. I'm simply not ready for it yet. What makes it worse, is that I am convinced that we will not see frost again this year. If I was ready, I could have vegetables in the ground a whole month early. Wouldn't that be grand. But alias I am not ready, and everything in due time.

The garden itself is definitely showing signs of life. I have uncovered the Garlic and Shallots as well as the Strawberry patch. The hay I used to protect them all winter was beginning to deteriorate underneath, so I felt it was import to get it off the plants before they to began to suffer from the hay rotting on top of them. The garlic and shallots seemed no worse for the ware, but the strawberries were beginning to be adversely affected. They lost about 10% of their previous fall growth. As this is my first year with them, I do not know if this is normal, or if using straw instead of hay would have been a better choice.


Strawberry Patch with winter hay protection

Garlic and Shallots with winter hay protection removed. Remember, if you are going to grow garlic and shallots, although you grow them as annuals, they must be planted in the fall. Over the winter months the ground freezes and then thaws over and over. They require this freezing and thawing to "bulb".

Shallots

Garlic


Horseradish will reproduce for thirty or more years. It can be planted in the fall or spring. The initial root you plant is about 8" or so long and about as thick as a pencil. I planted mine last spring, so the following are what they look like after one year.


Erosion over the winter exposed the tops of my horseradish. That allowed me to see how they are doing which is great. I covered them all after inspection, as I do not think it is a good idea to allow the tops to be exposed long term.

I actually dug a small piece up and made cocktail sauce with it. It was wonderful. I plan my first major harvest this fall.


Winter Wheat cover crop in main garden. I will till this in when it reaches about 8" high in another two weeks. This help add structure to the dirt

Seedling Progress


Seedlings are doing well, have all but melon, cucumber and pumpkin going. The following are pictures of my current seedlings:

Celery right as it was beginning to germinate back in early February. One of the harder vegetables to get good germination from. They're finicky, my strategy for them is to put the seeds in the freezer four weeks before I plan to plant them. This is called, stratification, it simulates "winter" for the seeds. Celery seeds seem to respond to this method. When I am ready to plant, I allow the seeds to come to room temperature, and I soak them in water overnight. After, I strain them with a coffee filter, then make sure that when I plant the seeds, I do not allow them to go below the surface of the soil medium. Celery seeds absolutely need light to germinate. Then as always, I cover with plastic wrap until most or at least some have germinated. The plastic wrap provides a sufficiently humid environment for the seeds to germinate. Then I remove the plastic wrap and just let them do their thing.


Celery now at 4 weeks. All they need  now is sufficient water and plant food. As ancestral Celery were marsh plants modern Celery needs to be kept constantly damp. Note I said damp, not wet. They are also heavy feeders, needing rich soil more so than most other vegetables. In another week, I will begin to mix a little fish emulsion into the water. I have found that as a plant food, fish emulsion works for me.


Leeks planted back in early February, at the same time as the celery. Now four weeks later, they need only water and a hair cut once a week. I keep them trimmed to 4" to 5" until it's time to transplant for two reasons, one I need them to fit under my lights, two I believe that doing so, results in a healthier, thicker leek.


After this weeks hair cut.


Cabbage at only one week. One of the easier vegetables to grow from seed. Just plant and water. Cover with plastic wrap until they germinate.


One week old tomato seedlings. Not 100% germination yet, but getting there.
Tomatoes:

Cover the seeds, they germinate better in the dark. Keep the soil temp as close as possible to 80° for prompt germination. Keep as near as possible to 60° after germination. Chilling to induce early bloom often works well, but it must be done early, when the first true leaves are opening up and the plant is only about 1 1/2" tall. Night temperatures of 50°-55° for two to three weeks are usually effective. Do not set out before reasonably sure that it is past the last frost. Bury tomato plants parallel to the soil surface, right up to the top tuft of leaves. dig a long shallow trench, not a deep hole, that is too cold for roots. Need an ample supply of potash and phosphorus. Dig in rock phosphorus and bone meal before transplanting. Avoid too much Nitrogen. Add Nitrogen at bloom by adding diluted fish emulsion. After mid June add mulch, not before. For staked plants prune suckers that appear in the leaf axils. Do not smoke around tomato plants. Try to use black mulch under plants. Remove prior to summer or add topping of hay/straw mulch to keep soil from getting too hot.

Tobacco Mosaic Virus- Do not plant Tomato and Pepper seedlings in the same bed. Spray seedlings with skim milk to lowers the PH on the surface of the leaves so they are less susceptible to mildew and viral infections.

Tomatoes are subject to Tobacco Mosaic Virus just like Peppers. Adhere to the preventative measures set forth in the previous post entitled Peppers and Tobacco Mosaic Virus.

Peppers after two weeks. I think that peppers are one of the hardest seeds to get to germinate. I still don't have 100% germination. I hope in another week, the remaining seeds will germinate.

Pepper seedlings, I added this just because I thought it was a cool picture.

So that is it for now, I have melons, cucumber and pumpkin to plant in coming weeks. The 1st of the seedlings will go into dirt a month from now.