 |
| My latest |
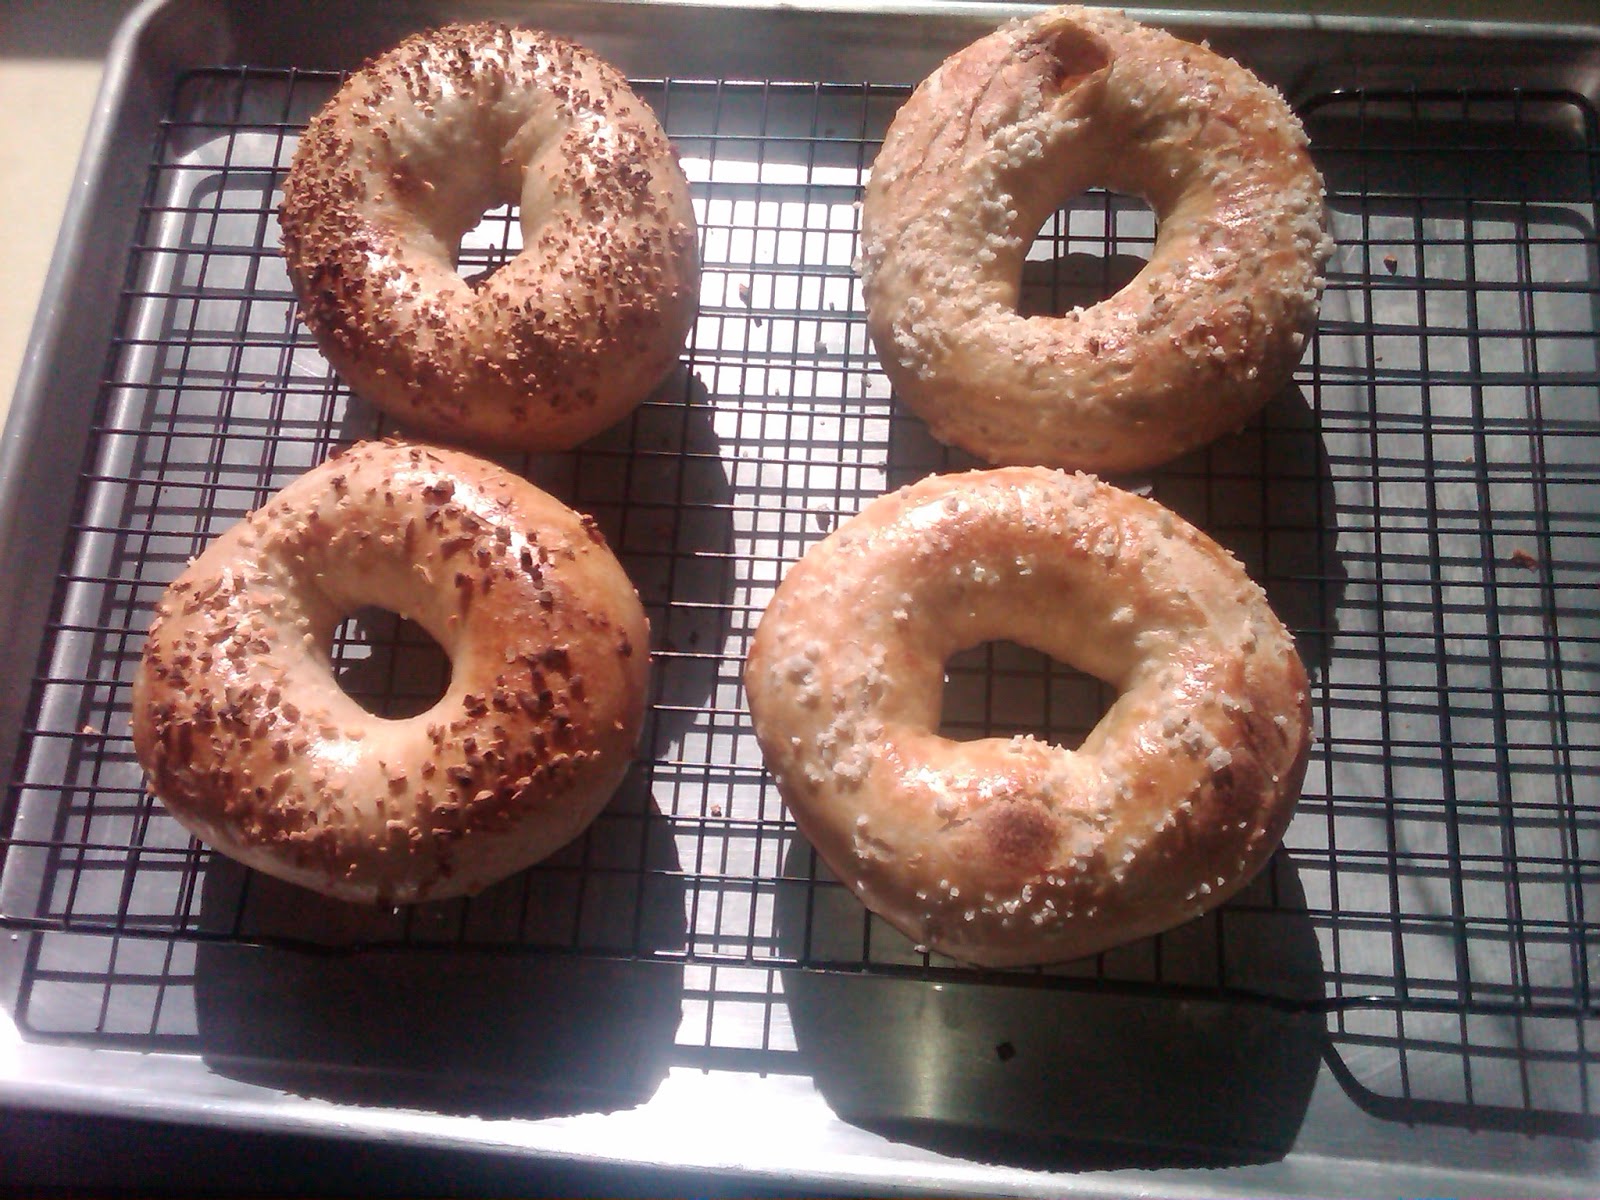 |
| Pretty good I think |
Bagels – The Recipe
*All ingredient Baker Percents listed in recipe are based on Total Weight of Flour
TWF - 1,004 grams
Hydration - 54%-57%
Makes 10 each 3.75 oz. Bagels
Makes 10 each 3.75 oz. Bagels
 |
| Do yourself a favor, weigh out all ingredients before you start to mix anything |
Preferment (Sponge):
Active Dry Yeast - 7 grams - .7%
High Gluten Flour (King Arthur Sir
Lancelot) - 538 grams - 54 %
Bottled Water, warm - 100° - 538 grams (*415 grams after the deduction of water used to proof the yeast) - 54%
*Proof the yeast in 123 grams of the water listed above - 100° - plus a pinch of sugar - 10 minutes or so until it's frothy
Add proofed yeast mixture to mixer
Add remaining water, flour and mix until just combined with whisk. It should form a smooth batter
not unlike a pancake batter
Decision:
Now you must allow the mixture to ferment. Either you do it warm and fast (relatively) or cold and slow.
Now you must allow the mixture to ferment. Either you do it warm and fast (relatively) or cold and slow.
Warm and fast; allow to sit at room temperature (70°-80°+) covered with plastic
wrap, until at least double, frothy, (easily 4+ hours). Preferment is ready to use at this point.
Cold and slow; allow to sit at room temperature (70°+) covered with plastic wrap, until active fomentation is observed (bubbles become visible)(easily 1-1.5 hours). Place in 40° for at least overnight to up to 24 hours. When ready allow the sponge come to room temperature, 1-2 hours. If when you remove the sponge from the refrigerator that the sponge has not fully developed, i.e. at least doubled in size and frothy, allow it to continue to develop at room temperature until it does.
*Sponge fully developed with the warm ad fast method = lots of bubbles, and warm.... go ahead put your ear down close to it, you can hear it popping, this is when you know your preferment is close to maturity. When it is obviously doubled in size, when it looks like it will collapse at any second, when it jiggles like jello, when it smells robustly yeasty, and when the sound of the carbon dioxide bubbles bursting is almost at a roar (ok, I exaggerate), then your sponge is fully developed.
Dough:
High Gluten Flour (King Arthur Sir
Lancelot) - 466 grams - 46%
Diastatic Malt Powder - 6 grams - .6%
Non-Diastatic Malt Powder - 34 grams -
1%
Bottled Water, warm - 100° - 50 grams - Reserve for tweaking the dough to get proper hydration
Bottled Water, warm - 100° - 50 grams - Reserve for tweaking the dough to get proper hydration
Salt - 18 grams - 2.2% (RESERVE until after Autolyse)
Ferment:
Add to mixer:
Sponge
All dough ingredients except the 50 grams of tweaking water and the 18 grams of salt. Mix all until just combined.
*Note: You will probably find that the dough is very dry, add some of the reserved water at this point, 1 Tbl. at a time. You want to add just enough water to get the dough to just come together. This dough is meant to be very dry. You will add more water in the next step.
Autolyse for 30 minutes. Total
hydration should be obvious by the end of the autolyse.
Add:
Salt, knead for 10ish minutes- Allow dough to come together and show you what it is. I want mine end up slightly, ever so slightly, tacky.It is truly art to be able to tell when a particular dough is "just right", that is why it's called The Culinary Arts- I can only try to describe what I want to see in my finished bagel dough- it is one of the stiffest and driest of all doughs. Yet it is still somewhat tacky. Not completely dry. I add the remaining reserved water, 1Tbl. at a time until I get my dough to the proper hydration. I then knead the dough 10ish minutes. It should end up velvety, silky, springy, stiff...yet have a bit of tack.... it should definitely not be sticking to the sides of the mixing bowl or your hands, but instead roll around it, coming off the sides easily.
Salt, knead for 10ish minutes- Allow dough to come together and show you what it is. I want mine end up slightly, ever so slightly, tacky.It is truly art to be able to tell when a particular dough is "just right", that is why it's called The Culinary Arts- I can only try to describe what I want to see in my finished bagel dough- it is one of the stiffest and driest of all doughs. Yet it is still somewhat tacky. Not completely dry. I add the remaining reserved water, 1Tbl. at a time until I get my dough to the proper hydration. I then knead the dough 10ish minutes. It should end up velvety, silky, springy, stiff...yet have a bit of tack.... it should definitely not be sticking to the sides of the mixing bowl or your hands, but instead roll around it, coming off the sides easily.
When you are satisfied that your
dough is kneaded properly remove the dough and move to
the ferment step.
Place the dough into a rising
container that has been very lightly sprayed with oil spray. Cover with plastic
wrap, and allow to double in size at room temperature - 70° - 80° for a warm and fast rise (easily 2 hours). Or alternatively, place
into 40° for a cold and slow rise for 24-72 hours.
Scaling:
When you are satisfied your dough has doubled, degas gently, scale and shape. If you rose your dough slow and cold, allow to come to room temperature for a few hours before this step. I like to scale to 4oz./113.4grams if using the modern method, if using the traditional method roll out in a long log about 3" thick. Follow steps in Bagel Technique post.
After scaling, decide on which method to use to shape.
Shaping:
Either shape into rounds if using the "modern" method or cut and roll into long log if using the "traditional" method, (see Bagels - The Technique). Now let either the rolls or the log rest for a full 15 minutes. Which ever method you use, after shaping place on parchment paper lined sheet pan that has been lightly dusted with Semolina flour.
Once shaped, cover sheet pan with a cotton cloth and allow to proof until 1 1/2 times original size. Proof only as long as it takes
for the bagels to pass the float test I (again see Bagels - The Technique).
Retarding:
Not required when using this recipe since it's purpose is to enhance the flavor of the dough through slow ferment and we've already done that twice. You can skip this and go directly to the boiling step.
Not required when using this recipe since it's purpose is to enhance the flavor of the dough through slow ferment and we've already done that twice. You can skip this and go directly to the boiling step.
Boil Bath;
Water (Tap) - 1 gallon
Malt Syrup - 2 Tb.
Baking Soda- 1 tsp.
Bring to a vigorous boil
Preheat oven to 450°
Prepare glaze;
Preheat oven to 450°
Prepare glaze;
Egg Whites - 2 each
Water (Tap) - 2 tsp.
Whisk, run through a strainer (I
use a mesh strainer), whisk again (DO NOT whisk so much that you create a
froth, you do not want a frothy glaze you just want it to be spreadable. NO
Bubbles in the glaze)
Gather Toppings: (Choice of)
Nothing
Dried Garlic chips
Dried Onion chips
Salt (Course)
Poppy Seed
Sesame Seed
Caraway Seed
Shredded Cheddar/Parmesan
Whatever else you can think of that would be good- experiment
Place only 2-3 bagels at a time into the boil bath, if they were float tested properly they will float immediately. If they do not you didn't proof long enough. Boil 30 seconds on each side. No longer. Remember, the longer you boil per side, the thicker the resulting crust. Remove to a kitchen towel, pat dry. As each batch is finished being boiled, brush with glaze while still on kitchen towel. Also while still on the towel, top as desired. If leaving plain, still glaze. Do not leave on kitchen towel for more than a minute or they will stick to towel.
Place glazed and topped bagels onto bagel boards (or sheet pan lined with parchment paper), place them topped side down on the bagel boards.
Preheat the oven for at least an hour to 450°. At this point I simply want the bagels to brown evenly. This is easier said than done. I don’t know why but it seems they want to brown too much on the bottom before they brown on the top.
It's been two years since I originally wrote this post. I have been refining my recipe and technique all along updating both bagel posts as I learned. I know now why my bagels always got done on the bottom before the tops were done...
Because the rack with the pizza stone was too low in the oven, and the oven temperature was too low to brown the bagal top before the heat of the stone browned the bottom. Realize that you have a dry bottom of the bagel when flipped coming in direct contact with the hot pizza stone while the top has been steamed and is very moist from the wet burlap on the board. The top needs time to dry before it starts to brown while the already dry bottom starts to brown immediately.
So....
- Make sure you place the rack with the pizza stone towards the top of your oven to get it as far away from the heating element (my oven is electric) as possible. Also it will put the bagel top in the hottest part of your oven once flipped, as hot air rises.
- After opening the door to flip the bagels off the bagel board onto the pizza stone, you will have lost tremendous amount of your oven heat. Jack the oven up as high as it will go (550°), immediately.
- This will get the bottom and the top done at the same time
Remove from oven to a room temperature cooling rack that is at
room temperature.
Do not cut while hot.
Enjoy the fruits of your adventure
No comments:
Post a Comment